İşletmelerin lavabo satın almadan önce düşündüğü birçok seçenek var. Bu işletmeler doğrudan müşterilerle etkileşime giriyor. Bu nedenle, piyasa ihtiyaçlarının daha fazla farkındalar ve bunları yerine getirmek istiyorlar.
Pazar ihtiyaçlarını karşılamanın bir yolu, müşterilere birçok seçenek sunmaktır. İş burada satış yapmayı planladıkları farklı lavaboların yapımına bakacak. Bu lavabolardan biri paslanmaz çelik lavabolardır.
Paslanmaz çelik evyeler çok dayanıklı. Bu yüzden ev sahipleri onları diğer lavabo türlerine göre tercih ediyorlar. İşletmeler de onları diğer lavabolara tercih ediyorlar çünkü satmak daha kolay.
Paslanmaz çelik lavabolar iki tiptir: Biri çizilmiş paslanmaz çelik lavabo ve diğeri el yapımı paslanmaz çelik lavabo. Her ikisinin de faydaları ve dezavantajları var, bu yüzden hedeflediğiniz pazara göre seçiminizi dikkatlice yapın.
Çizilmiş paslanmaz çelik lavabo üretmek
Bu makalede, çizilmiş paslanmaz çelik lavabonun üretim sürecine odaklanıyoruz.
İşlenmemiş içerikler
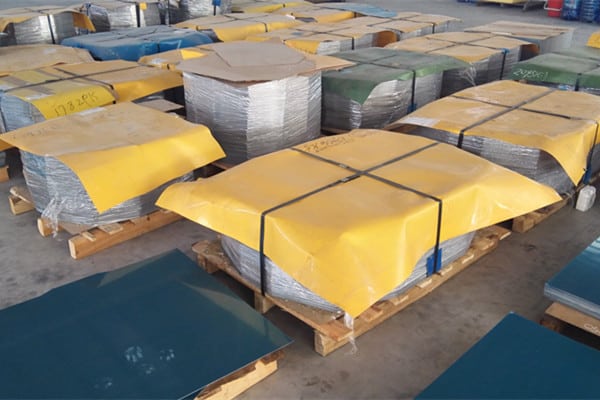
Eh, ilk adımüretim süreci hammaddeleri seçiyor.
Bir lavaboda kullanılan çelik genellikle 0.8 mm ila 1.5 mm arasında ölçülür. Genellikle, bir fabrika herkesin ihtiyaçlarını karşılamak için farklı uzunluklar ve genişlikler satın alır.
Daha sonra paslanmaz çeliği bir rulo şeklinde bir atölyeye taşırsınız.
Malzeme laminasyonu
Sonra laminasyon işlemi gelir. Germe sırasında malzemeye potansiyel olarak zarar verebilirsiniz. Bu hasarı önlemek için, üretici işlemin başlangıcında çelik plakayı kaplar.
Bununla birlikte, çelik tabakanın sadece bir tarafını kaptırırsınız, çünkü diğerinin germe işleminde kalıpla yüzleşmesi gerekecektir.
Malzemeyi Kesmek
Bundan sonra kesme işlemi var.
Üretici uzun çelik plakayı farklı boyutlara keser. Çelik sayfasını birsilindir sıkıştırma Koruyucu film ile birlikte bölge. Bu, kaplama işlemini de tamamlar.
Bundan sonra, işçi çelik sacını bir giyotin bıçağından geçirir. Bu, gerekli uygun boyutlara keser.
Malzemenin açı kesimi
Bundan sonra malzeme açılı kesim işlemi gelir. Bu, levhanın lavabonun görünümüne uyacak şekilde kalıplanmasını içerir.
Yağ Uygulamak
Daha sonra streç yağı çarşafın her iki tarafına eşit miktarda sürüyorsunuz. Bu, gerilme çatlaması olasılığını azaltmaya yardımcı olur ve çeliğin ömrünü uzatır.
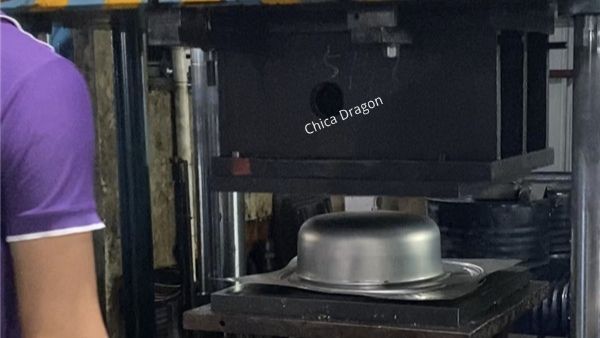
İlk Çizim
Bundan sonra üretici çeliği bir pres tablasına yerleştirir. Ürün kalıbını tezgah plakalarının üst ve alt delikleri arasına yerleştirirseniz daha iyi olur.
Daha sonra motoru açmalısınız. Bu, üst plakayı düşürür hidrolik pres, bu da tüm masayı aşağıya doğru iter.
Bu işlem sırasında yatay konum aynı kalır. Bu nedenle çelik levhanın form esnemesini tamamlamak için yukarıya doğru gitmekten başka seçeneği yoktur.
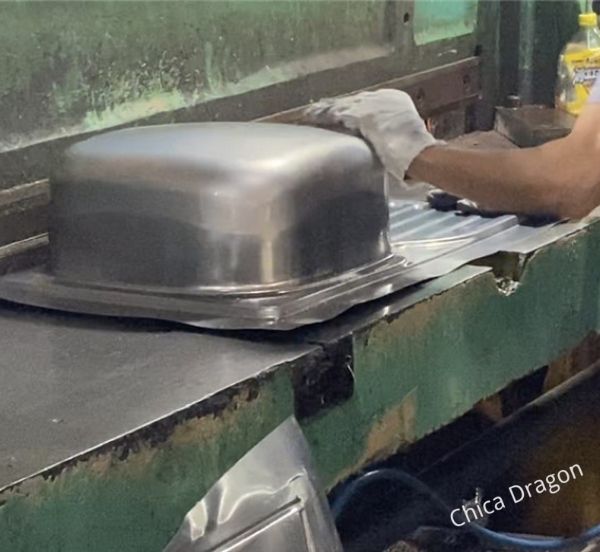
Temizlik
Üretici şimdi bu lavaboyu kaplamanın kaldırılması için bir temizleme alanına gönderecek. Ayrıca kalan çekme yağı da yıkanır. Bu, çelik sacı tavlama işlemine hazırlar.
Tavlama
butavlama Süreç derinlik gereksinimlerini karşılamak için vardır. Bazı üreticiler ayrıca ikincil bir çizimi de tercih eder.
Su kabının derinliği 160mm civarında ise tek çizim ile bunu başarabilirsiniz. Ancak derinlik yaklaşık 180 mm'ye ulaşırsa ikinci bir çizime ihtiyacınız vardır. Bunun nedeni paslanmaz çelik sacın çatlama olasılığının daha yüksek olmasıdır.
Tavlamanın işe yaradığı yer burasıdır. Tavlama, hasar görmüş paslanmaz çelik plakaların aktivitesini geri kazandırır. Bu işlem için hat veya fırın kullanabilirsiniz.
Tavlama Hattı
Tavlama hattı 20 metre uzunluğunda, genellikle 1100 derece civarında bir yüksek sıcaklık hattıdır. Hat üzerinde iki giriş ve iki çıkış bulunmaktadır.
Bir teleferik veya taşıma bandı, lavaboyu tavlama hattı boyunca taşır. Aynı anda yaklaşık 25 lavaboyu tavlayabilirsiniz.
Ayrıca paslanmaz çelik, gerilme nedeniyle bazı manyetik özellikler üretir. Bunları ortadan kaldırmak için manyetikliği gidermeyi kullanabilirsiniz.
Bazı kişiler tavlama işlemi için hat yerine fırın da kullanır.
İkinci Çizim
Bundan sonra üretici lavaboyu hidrolik presten geçirir. Bu ikinci çizimin daha doğru olması ve tasarımın derinliğine tam olarak çizilmesi gerekiyor.
Kenarları Kesmek
O zaman lavabonun kenarlarını ürün tasarımına göre kesmeniz daha iyi olur. Lavabonun montaj konumunu da ayırmayı unutmayın.
Delme Süreci
Daha sonra delme işlemi gelir. Üretici taşma deliği açar ve zımbalardaki delikleri boşaltır. Bunu plakanın her bölümünde yapın. Delme ekipmanı ideal durumda olmayabilir ve birlikte yaparsanız tüm plakaları delemeyebilir.
İster tek gözlü lavabo, ister çift gözlü lavabo olsun, zımba makinesi tarafından tek seferde şekillendirilir.
Çift çanaklı bir lavabo seçerseniz sonraki adımları göz ardı edin.
Kaynak
Eğer bir yere gidiyorsaniki yuvalı çanak kaynak havuzu, lavabonun üst plakasına deldikten sonra kaynak yapmalısınız. Sen kullanıyorsunCNC kaynakbu süreç için.
Alın kaynak lavabosu üretiyorsanız, lavabonun her iki tarafına da alın kaynağı yapmalısınız. Bununla birlikte, alın kaynağı lavabosu oldukça nadirdir ve pek çok insan bunu tercih etmez.
Nokta Kaynağı
(Çift kaseli bir kalıp seçerseniz atlayın.)
Bir sonraki adım, kaburgaları güçlendirmek için nokta kaynağı yapmaktır.
Kaburgaları nokta kaynaklamak için bir lazer kaynak makinesi kullanmanız en iyisi olacaktır. Her nokta kaynak prosedürü yaklaşık üç lehim bağlantısı üretir. Kaynak işlemini farklı yerlerde birkaç kez yapmalısınız. Bazen üretici bu işlem için güçlendirilmiş kaburgalar kullanır.
Parlatma
Daha sonra üretici lavabonun yüzeyine cilalama işlemi uygular.
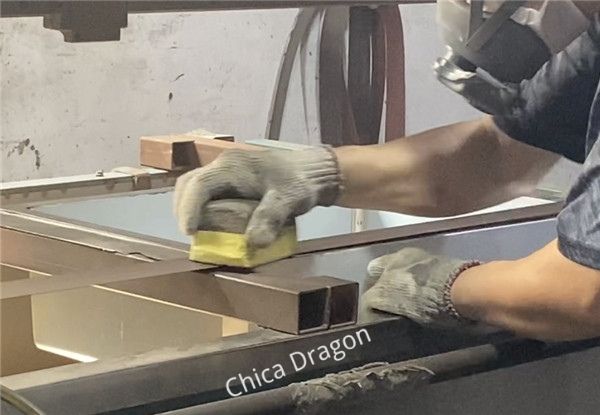
Lavabo Tabanı
Öncelikle lavabonun altını parlatıyorsunuz ve ardından lavabonun diğer tüm farklı kısımlarına geçiyorsunuz.
Lavabo Duvarı
Daha sonra lavabonun duvarını parlatıyorsunuz. Daha sonra eğer tasarımınız çift çanaklı bir kalıp değilse lavabonun birleşim yerini parlatıyorsunuz.
Aşındırıcı Tekerleklerin Kullanımı
Fırçalardan dolayı ortaya çıkan farklı çizgileri cilalamak için de aşındırıcı disk kullanmalısınız.
Üst Plaka
Bundan sonra lavabonun üst plakasını cilalamanız gerekir. Bunu, lavabonun yüzeyinde görünen kaynak çizgilerini ve yüzey kusurlarını ortadan kaldırmak için yaparsınız.
Delikleri Delmek
Daha sonra musluk deliklerinin delinmesi gelir. Lavabo siparişinizin konum gerekliliklerine göre batarya deliğini kazmanız gerekmektedir. Bu adımı lavaboyu üretirken herhangi bir noktada gerçekleştirebilirsiniz.
Lavaboyu Markalamak
Daha sonra lavabonun üzerine logo basılarak markalanacaksınız. Damgalamayı lazer yöntemiyle veya şablon yöntemiyle yapabilirsiniz.
Kişisel olarak lazer yönteminin tam otomatik olması nedeniyle daha iyi olduğunu, dolayısıyla hata ihtimalinin düşük olduğunu söyleyebilirim.
Ayrıca, çok sayıda düşük maliyetli lazer markalama mevcuttur. Lazer, filmin ışık ileten kısmından doğrudan geçer. Bu, logoyu doğrudan paslanmaz çeliğin üzerine yakar.
Lavabonun Tamiri
Bazen lavaboda küçük onarımların gerekli olduğunu unutmayın. Bu, lavabonun üretim sürecinde dayandığı küçük hasarlardan kaynaklanmaktadır.
Üretici, görünümünü ve değerini artırmak için lavaboyu onarım alanına gönderir.
Sprey Boya Tedavisi
Paketlemeden önceki son adım sprey boya işlemidir. Püskürtme işleminin birçok avantajı vardır. Lavabonun biraz ağırlık kazanmasına neden olur. Üstelik tavlama işleminden kaynaklanan izleri de kapsar. Ayrıca mutfakta lavabo yüzeyinde yoğuşmayı önler.
Ancak üreticilerin kullandığı mevcut spreylerin yoğuşmayı önleme işlevi yoktur.
Turşu
Püskürtmenin bir başka alternatifi dekapajdır. Asitleme ayrıca tavlama nedeniyle levha üzerindeki yanık lekelerini de ortadan kaldırabilir.
Temizleme Süreci
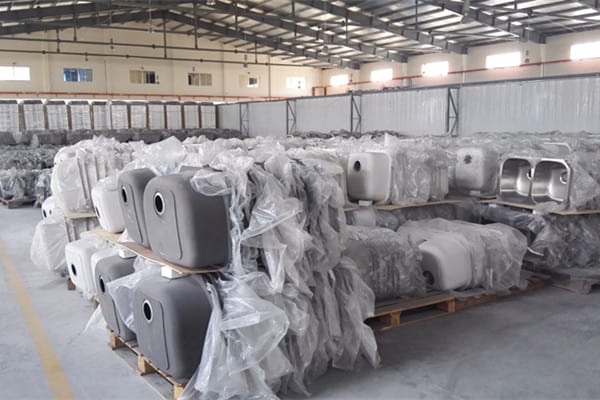
Then comes the cleaning process. The worker removes the stretch oil from the stainless steel sheet. The debris and dirt from the different manufacturing processes are also removed.
The sink is then ready for packaging and selling.
FILL IN THIS FORM TO REQUEST A QUICK QUOTE FROM CHICA DRAGON
SSS
Are There Different Types Of Stainless Steel Sinks?
Stainless steel sinks are available in ranges from 16 gauge to 22 gauge. The 16 gauge is thicker and is more resistant to dents. These sinks also insulate the sound of water splashing.
What Is The Easiest Sink To Clean?
Stainless steel sinks are very easy to keep spotless. The steel isgözeneksizBu da lekelerin ve yemek artıklarının üzerine yapışamayacağı anlamına gelir. Sterilize edilmeleri çok kolay olduğundan genellikle hastanelerde de kullanılırlar.
Paslanmaz Çelik Lavabolar Ne Kadar Ömürlüdür?
Paslanmaz çelik lavabolar genellikle uzun ömürlüdür. 15 ila 25 yıl kadar dayanabilirler. Ancak porselen ve demir çekirdekli lavabolar gibi diğer alternatifler daha da uzun süre dayanabilir. Genellikle bunları eviniz kadar dayanacak şekilde yenileyebilirsiniz.
Paslanmaz Çelik Lavabodan Çizikler Çıkarılabilir mi?
Çizikleri gidermek için Revere Paslanmaz Çelik veya Comet gibi temizleyicileri kullanabilirsiniz. Bu çizikleri gizleyebilecek cila da mevcuttur. Bu da bu lavaboları müşteriler için daha çekici kılıyor.
Nihayet
Paslanmaz çelik evyeler are very durable and easy to operate. However, keep in mind that these sinks are slowly going out of fashion.
Müşterilerin bunlara tercih edeceği daha iyi alternatifler mevcut.
Hedeflediğiniz pazarı ve onların ihtiyaçlarını aklınızda bulundurun.
İyi şanlar!